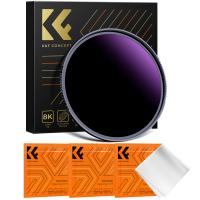
What Ir Filter Works Without A Converted Camera?
Infrared (IR) photography has gained popularity among photography enthusiasts for its unique and ethereal results. However, many people believe that to achieve good IR photos, one must convert their camera to be sensitive to infrared light. This is not entirely true. There are IR filters available that can be used with unconverted cameras to capture stunning infrared images. In this article, we will explore the different types of IR filters that work without a converted camera, how to use them effectively, and some practical tips to get the best results.

Understanding Infrared Photography
Infrared photography involves capturing light that is not visible to the human eye. This light falls in the infrared spectrum, which ranges from about 700 nm to 1,200 nm. When using an IR filter, the camera sensor captures this light, resulting in images with surreal colors and contrasts. Common subjects in IR photography include landscapes, architecture, and portraits, each offering a unique perspective when captured in infrared.
Types of IR Filters
There are several types of IR filters available on the market, each with its own characteristics and suitable applications. Here are some of the most popular ones:
1. 720nm IR Filter: This is the most commonly used IR filter. It blocks most visible light and allows infrared light above 720 nm to pass through. This filter is ideal for capturing classic IR images with white foliage and dark skies.
2. 850nm IR Filter: This filter blocks all visible light and only allows infrared light above 850 nm to pass through. The resulting images are more monochromatic, with higher contrast and less color information.
3. 590nm IR Filter: This filter allows some visible light to pass through along with infrared light above 590 nm. The resulting images have a mix of visible and infrared light, creating a unique color palette.
4. 665nm IR Filter: This filter allows more visible light to pass through compared to the 720nm filter, resulting in images with more color information and less contrast.
Using IR Filters with Unconverted Cameras
Using an IR filter with an unconverted camera can be challenging but not impossible. Here are some steps to help you get started:
1. Choose the Right Filter: Depending on the type of images you want to capture, choose an IR filter that suits your needs. For beginners, the 720nm filter is a good starting point as it offers a balance between visible and infrared light.
2. Set Up Your Camera: Attach the IR filter to your camera lens. Since IR filters block most visible light, you will need to use a tripod to stabilize your camera for long exposure shots. Set your camera to manual mode to have full control over the exposure settings.
3. Focus Before Attaching the Filter: Infrared light focuses differently than visible light. To ensure sharp images, focus your camera before attaching the IR filter. Some cameras have a live view mode that can help with focusing after the filter is attached.
4. Adjust Exposure Settings: Since IR filters block most visible light, you will need to use longer exposure times to capture enough light. Start with a base ISO setting (e.g., ISO 100) and adjust the shutter speed accordingly. You may need to experiment with different exposure times to get the desired results.
5. White Balance: Set a custom white balance to achieve the best results. You can do this by taking a picture of a white or gray object and setting it as the custom white balance reference in your camera settings.
6. Post-Processing: Infrared images often require post-processing to bring out the best results. Use photo editing software to adjust the white balance, contrast, and colors. You can also experiment with channel swapping to create unique color effects.
Practical Tips for Infrared Photography
1. Shoot in RAW: Shooting in RAW format gives you more flexibility in post-processing. RAW files contain more data compared to JPEGs, allowing you to make significant adjustments without losing image quality.
2. Use a Tripod: Since IR photography often requires long exposure times, using a tripod is essential to avoid camera shake and ensure sharp images.
3. Experiment with Different Subjects: Infrared photography can transform ordinary scenes into something extraordinary. Experiment with different subjects such as landscapes, architecture, and portraits to see how they look in infrared.
4. Check the Weather: Clear, sunny days are ideal for infrared photography as they provide plenty of infrared light. Overcast days may result in less dramatic images.
5. Practice Patience: Infrared photography can be challenging, especially when using an unconverted camera. Be patient and keep experimenting with different settings and techniques to achieve the best results.
Infrared photography offers a unique way to see the world, and you don't necessarily need a converted camera to get started. By using the right IR filter and following the tips mentioned in this article, you can capture stunning infrared images with your unconverted camera. Whether you are a beginner or an experienced photographer, infrared photography can add a new dimension to your creative portfolio. So, grab an IR filter, set up your camera, and start exploring the fascinating world of infrared photography.






![[4X Optical Zoom] Recharge power Security Camera PTZ Outdoor for Home Security with Human Detection Auto Tracking-EU Standard [4X Optical Zoom] Recharge power Security Camera PTZ Outdoor for Home Security with Human Detection Auto Tracking-EU Standard](https://img.kentfaith.com/cache/catalog/products/us/KF50.0003/KF50.0003-1-200x200.jpg)
