Where Does The Slide Go On A Microscope?
The microscope is an essential tool in many scientific fields, especially in biological and medical research. One of the fundamental components of using a microscope is knowing where to place the slide, which holds the sample you are examining. In this article, we will cover the basic aspects of the microscope, the correct placement of the slide, and address practical concerns regarding its use.
Understanding the Components of a Microscope

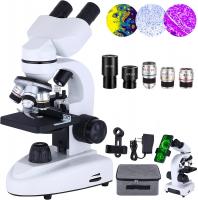
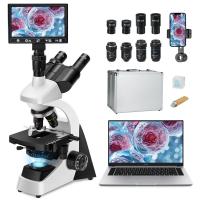
Before diving into the specific details of where the slide goes on a microscope, it's crucial to understand the main components of the device. Here are the key parts:
1. Eyepiece (Ocular Lens): This is where you look through to see the magnified image of the sample.
2. Objective Lenses: These are located on the rotating nosepiece and provide various levels of magnification.
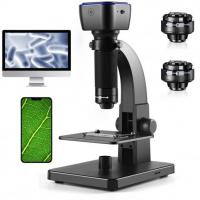
3. Stage: This is the flat platform where the slide is placed.
4. Stage Clips or Stage Holder: These secure the slide in place on the stage.
5. Light Source: Illuminates the sample, enabling clearer viewing.
6. Focus Knobs: Usually include coarse and fine adjustment knobs for focusing the image.
7. Condenser Lens: Focuses the light onto the sample.
Correct Placement of the Slide
The slide is typically a small rectangular piece of glass or plastic that holds the sample for examination. Proper placement of the slide is vital for optimal viewing and accurately interpreting the sample. Here’s how to correctly place the slide on the microscope:
1. Prepare the Slide: Ensure the sample is accurately positioned on the slide and covered with a coverslip if necessary. The coverslip protects the sample and keeps it flat.
2. Adjust the Stage: Most modern microscopes have a mechanical stage that can be moved up, down, left, and right using control knobs. Adjust the stage so that it is in the lowest position—far away from the objective lenses to start.
3. Place the Slide: Open the stage clips or holder. Place the slide in the center of the stage, aligning it with the light source below.
4. Secure the Slide: Release the stage clips or tighten the stage holder so that the slide is firmly held in place. This prevents movement when adjusting the focus.
5. Center the Slide: Use the mechanical stage controls to center the sample under the objective lens. Most microscopes have markings on the stage to help with precise alignment.
Initial Focusing

After placing the slide, the next step is to bring the sample into focus. Begin with the lowest power objective lens to make it easier to locate the sample. Here’s a simple process to follow:
1. Select Low Power Objective: Rotate the nosepiece to lock the lowest power objective lens (4x or 10x) into place.
2. Coarse Focusing: Use the coarse focus knob to raise the stage slowly. Bring it close to the objective lens, but be careful to avoid touching the lens to the slide as this can damage both.
3. Look Through the Eyepiece: Once you are close, look through the eyepiece while further adjusting with the coarse focus knob to find the sample.
4. Fine Focusing: Once the sample is visible, use the fine focus knob to sharpen the image.
5. Adjust Light: If necessary, use the diaphragm adjustment on the condenser to regulate the light intensity for clearer viewing.
Moving to Higher Magnification

After locating the sample and focusing it at low power, you may want to view it at higher magnification:
1. Center the Sample: Ensure the part of the sample you wish to study more closely is in the center of the field of view.
2. Rotate to Higher Objective: Carefully turn the nosepiece to switch to a higher power objective (20x, 40x, or even 100x oil immersion), taking care not to clash the lens with the slide.
3. Fine Focusing Again: Once the higher power objective is in position, use the fine focus knob to adjust the clarity as higher magnification reduces the depth of field.
Common Issues and Troubleshooting
Even with knowledge of positioning and focusing, users may encounter several common issues. Here are practical solutions for some of these problems:
1. Blurry Image: Often due to improper focus or dirty lenses. Use lens paper to clean the eyepiece and objectives gently. Recheck focus starting from the lowest magnification.
2. Slide Movement: Ensure the stage clips or mechanical stage holder is properly securing the slide. If the sample moves out of alignment, re-center using the mechanical stage controls.
3. Insufficient Light: Adjust the condenser or the light source's intensity. Verify that the diaphragm and any filters are correctly set.
4. Difficulty in locating the sample: Begin with the lowest power objective and make sure the sample is centered and properly prepared on the slide.
Tips for Prolonged Use
For those who frequently use microscopes, here are some additional tips for durability and prolonged usability:
1. Regular Maintenance: Clean the microscope lenses, stage, and other parts regularly with appropriate materials like lens paper and cleaning solutions.
2. Cover the Microscope: When not in use, cover the microscope with a dust cover to prevent dust accumulation which can impair functionality.
3. Proper Storage: Store the microscope in a clean, dry place, away from intense heat or humidity.
4. Handle with Care: Always carry the microscope using two hands—one on the arm and the other under the base to avoid accidents.
5. Periodic Professional Service: Consider professional servicing periodically to ensure all parts are functioning optimally.
Knowing where and how to place the slide on a microscope is fundamental for accurate sample examination. Understanding the various components of the microscope, correctly positioning and securing the slide, and focusing step-by-step ensures efficient and effective use. By addressing common issues and adhering to good maintenance practices, you can prolong the life of your microscope and achieve consistently clear and useful observations. Whether you are a beginner or an experienced user, these tips will ensure you can utilize your microscope to its fullest potential.



















There are no comments for this blog.